Connected Workspace Portal - New Customer Procedure:
Required Information
- Customer Name
- Customer Info
- Customer Admin Name
- Customer Admin Info
Create New Customer
- Browse to https://daasportal.star2star.io.
- Log into the Connected Workspace Portal using an account with DaaS Partner Admin or DaaS Partner Manager access.
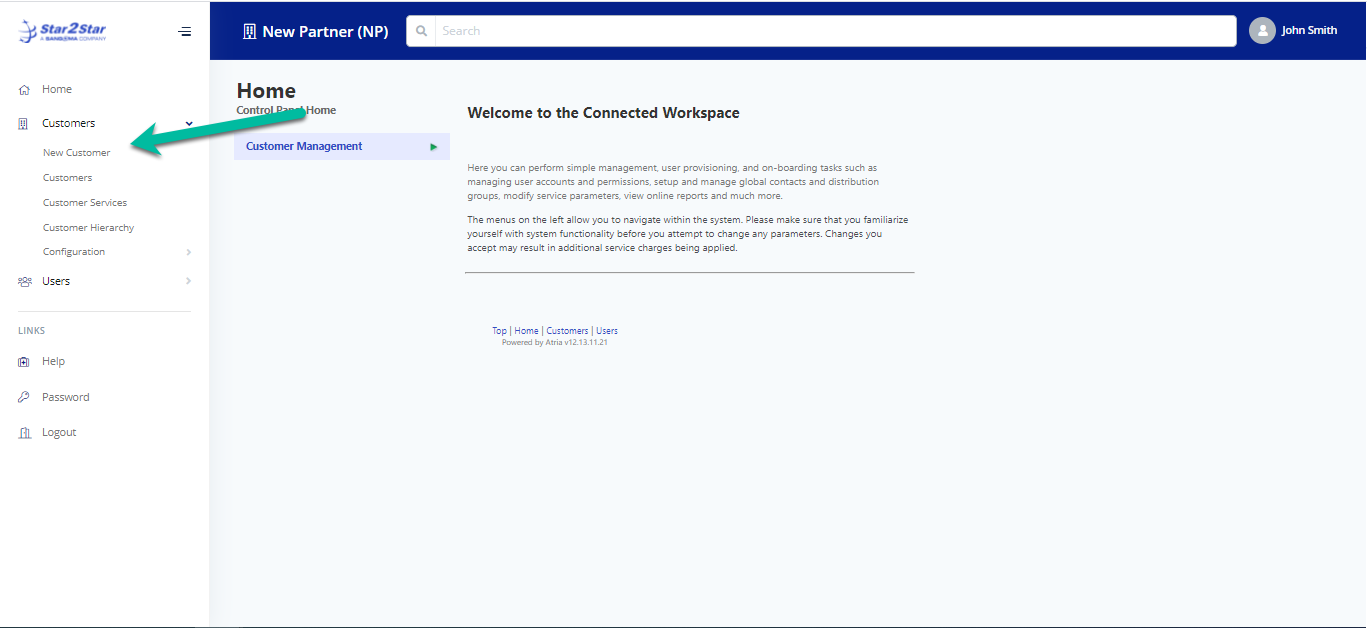
- At the main menu, expand Customers and click New Customer.
- Enter the basic information for the new Customer.
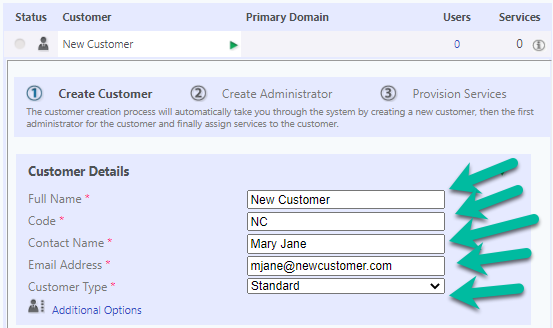
- For Full Name, enter the Customer’s company name.
- Unless specified otherwise, leave the Code set to the procedurally generated value that Connected Workspace Portal puts in the field. Make a note of this code, as it may be needed later in the customer creation procedure.
- For Contact Name and Email Address, enter the primary business contact information for the Customer. this information will be used to create the first Customer Administrator account.
- For a standard Customer, set the Customer Type to Standard. For a lab system set the value to Test. For an extended Demo, set the value to Demo.
- Click Additional Options.
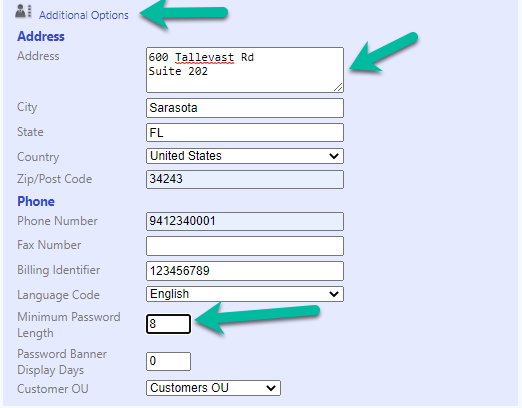
- Enter the appropriate administrative information in the Address and Phone
- sections, and set the Minimum Password Length to 8.
- For the Billing Identifier, enter the Customer ID from RocketQuote.
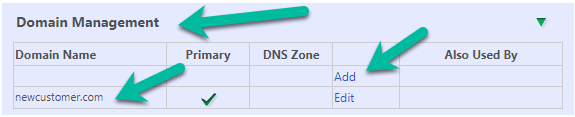
- In the Domain Management section, enter the Customer’s primary domain. Do not check the DNS Zone checkbox; it will only be used when Star2Star manages a Customer’s public DNS service. Click Update.
- Expand Advanced Properties.

- Click the Yes button for “Change password at next logon”.
- If this Customer will be used as a demo then set Demo Customer to Yes; otherwise leave it at No.
- Leave all other values in this section unchanged, and click Provision.
- At the Create Administrator window, enter the Customer Admin’s information:
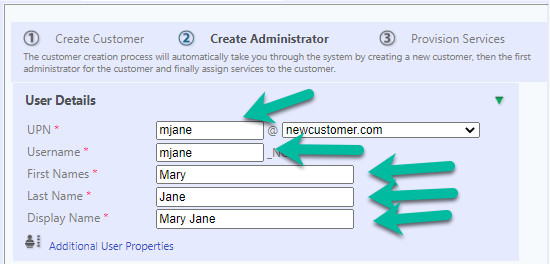
- For the UPN, enter the username and select the Customer Admin’s primary email domain.
- For the Username, enter the admin’s first initial and last name (Note: web browsers with an Autocomplete feature may automatically populate the username field).
- Enter the admin’s first and last names. The Display Name will be set automatically but can be corrected if necessary.
- Click Additional User Properties.
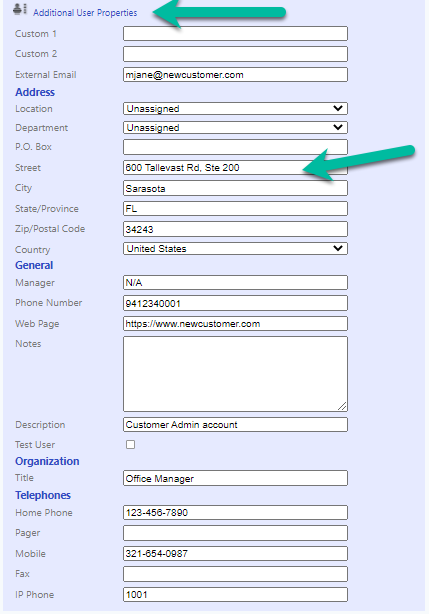
- Leave Custom 1 and Custom 2 blank.
- For External Email, enter a personal email account; this account will be used to send a temporary password.
- Leave Location and Department set to Unassigned.
- Populate the remaining administrative information as appropriate.
- For the initial password, enter a policy-compliant password that has a minimum of eight characters and and least two of three following:
- Upper- and lower-case letters
- Numbers 0-9
- Symbols such as !@#$%^&*()
- Additionally, the password may not contain nor be a variant of the username.
- Expand the Account Settings section, then click Advanced Options.
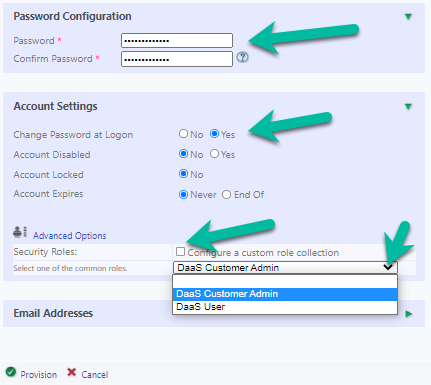
- Confirm that Change Password at Logon is set to Yes.
- Leave Account Disabled, Account Locked, and Account Expires set to No and Never, respectively.
- Expand Advanced Options.
- Uncheck the checkbox for Custom Role Collection.
- At Common Roles dropdown, select DaaS Partner Admin.
- Leave Email Addresses blank; the Portal will automatically populate the user’s email address.
- Click Provision.
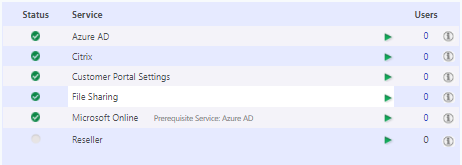
- At the Provision Services window, expand the Azure AD service. (Note: this step provisions a Microsoft Office 365 tenant for the Customer, and it can also be used to connect to an existing tenant that has been imported into Star2Star’s Microsoft Partner Center. This service and the Microsoft Online service can be skipped if the Customer will not use a Microsoft Office 365 tenant, or if the existing customer has not yet been imported into the Partner Center.)
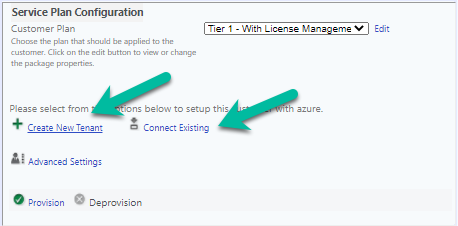
- If the customer has an existing tenant that has been imported into the Partner Center, click Connect Existing. If the customer will use a new Microsoft Office 365 tenant then click Create New Tenant.
- In the Domains section, for the Microsoft domain enter the Customer’s name in all lower-case letters with no spaces.
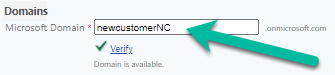
- Click the Verify Domain link. If the domain is available then proceed to the next step. If it is not, append the Customer Code that was generated when the customer was first created in Step 4. If that domain is unavailable, consult the Star2Star TTU team for guidance.
- In the Domain section, leave the In Azure and Set Target Addresses checkboxes unchecked.
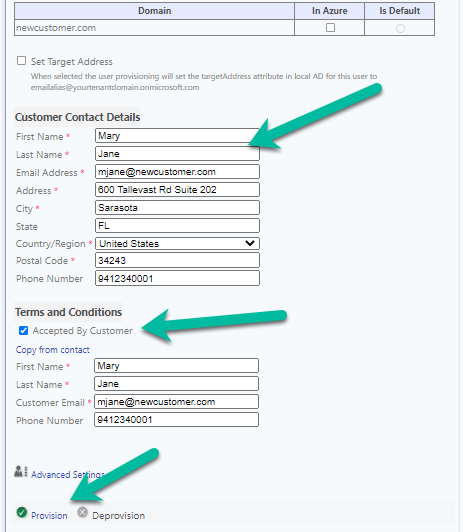
- Confirm the Customer Contact Details.
- Check the Accepted By Customer checkbox.
- Click the Copy from Contact link to copy the Customer Admin’s information, unless a different member of the Customer’s leadership needs to be listed as accepting the Microsoft Terms and Conditions.
- Click Provision. Note: This step creates a Microsoft Office 365 tenant and can take 2-3 minutes to complete. It must finish before the next step, provisioning the Microsoft Online service, can be started.
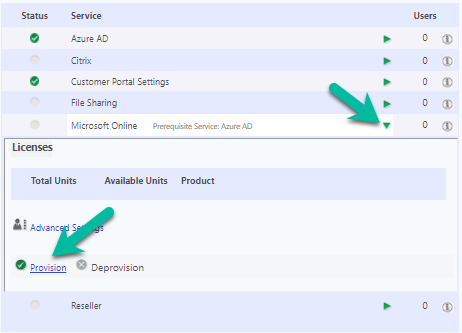
- Expand the Microsoft Online Service and click Provision.
- Expand the Citrix service.
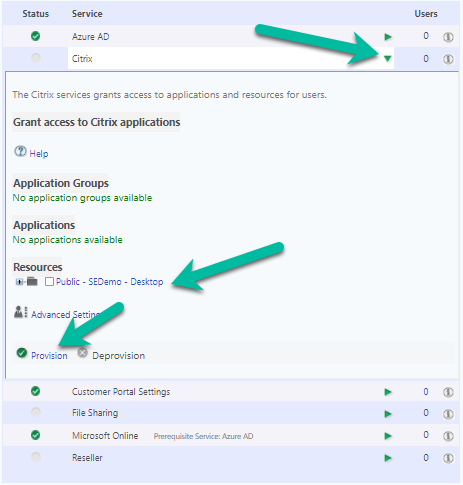
- In some cases, the Customer’s Applications and Desktop Resources will already be available; if so click their checkboxes as appropriate. If not, those resources will be published later and made available to the service for provisioning. Consult the Star2Star TTU team for more information on desktop and application provisioning.
- Even if no resources are currently available, click Provision.
- Expand the File Sharing service and click Provision.

- The Customer is now created and ready to provision users.
Completion
- New Customer is created.
- New Customer Admin account is created.
- Optional: New Microsoft Office 365 tenant is created
- Optional: Existing Microsoft Office 365 tenant is connected to the Portal
- The Citrix service is provisioned and ready to assign virtual desktop and application resources
- The Customer’s CorpShare (X:) drive and Users folder are created.