Bulk User Import
- Required Information
- Customer / Partner
- New User Info
- Connected Workspace: Open Customer
- Browse to https://daasportal.star2star.io.
- Log in using an account with User Administrator access.
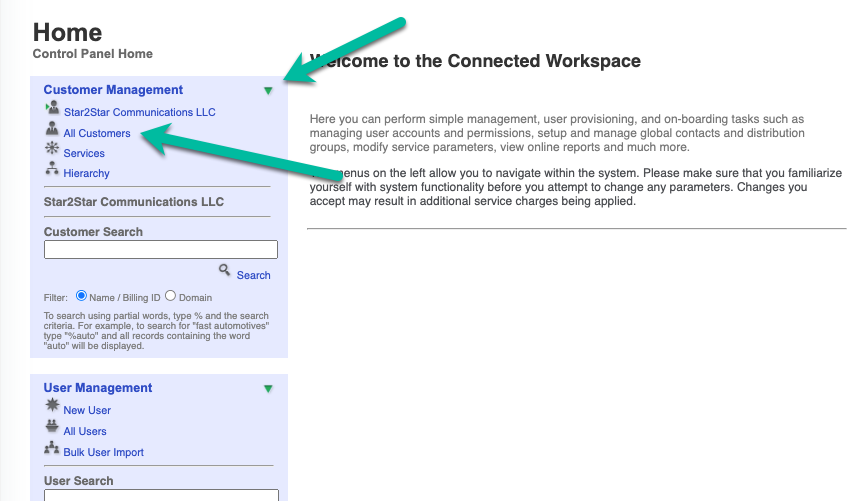
- Expand Customer Management by clicking the green triangle next to it and click All Customers.
- Expand the Reseller to whom the new Customer will be assigned by clicking the green triangle next to it and click Users.
- Expand a Reseller Administrator account and click Impersonate.
- In the side menu bar, click Customers.
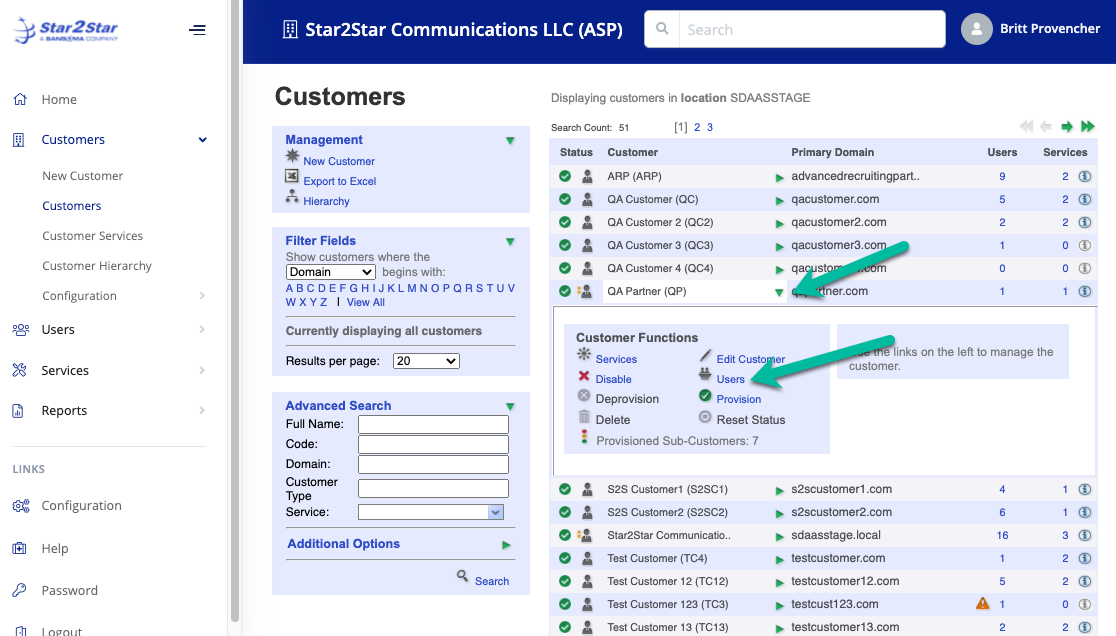
- Click the green arrow to expand the Customer to whom the new users should be assigned. Click Users.
- Connected Workspace: Download Template
- At the side menu, click Users | Bulk User Import.
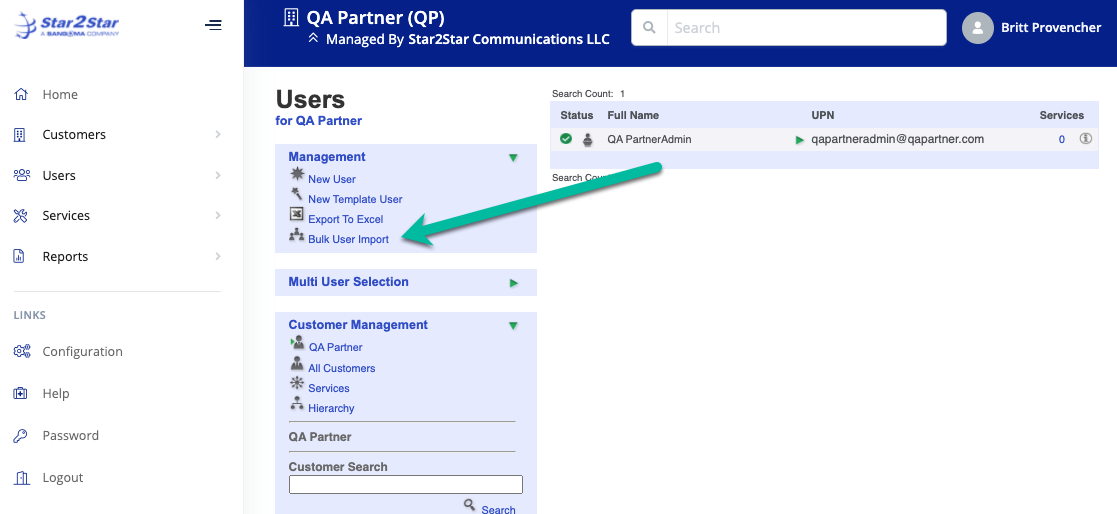
- If necessary, download the template by clicking New Users Template.
- Microsoft Excel: Populate the Spreadsheet.
- Open the spreadsheet in Microsoft Excel. In the UserImport.xlsx spreadsheet, enter the information for the new user. Note that comments in the header row of the spreadsheet provide additional information on the correct formatting for each column.

- Enter the user’s First and Last Name in columns A and B.
- Leave the Display Name blank unless the user has a different desired name.
- The Universal Principal Name (UPN) should be the user’s name followed by their primary email domain. Note that the UPN must be unique.
- Leave the Username column blank to leave the username to the default of <First Initial><Last Name>_<Customer Code>, unless a different username is desired.
- Leave the Location and Department columns blank.

- Enter the user’s primary business telephone number in the Phone Number column.
- Leave the Custom Field 1 and 2 columns blank.
- Leave the Roles 1 column blank unless this user should have some form of administrative access. If the user should have administrative access, only enter desired roles, separated by a comma if there are multiple roles. The most common values are User Administrator and Partial User Administrator.
- Leave the Roles 2-4 columns blank unless more than 250 characters are needed for the Roles 1 column.
- Set Account Disabled to FALSE.
- Set Change Password at Logon to TRUE.
- Set Password Never Expires to FALSE.

- In the Email Addresses 1 column, enter the user’s primary email address. If the user should be reachable at more than one address, enter those additional addresses separated by commas.
- Leave Email Addresses 2-4 blank unless more space is needed.
- Leave External Email Address blank.
- Leave the X500 ProxyAddresses columns blank.
- Enter the appropriate information in the remaining columns for the user’s business address and Title.
- Repeat Step #7 for additional users to be added.
- Save the File.
- Connected Workspace: Upload the Spreadsheet
- In the Connected Workspace, click the Choose File button and browse to the saved file.
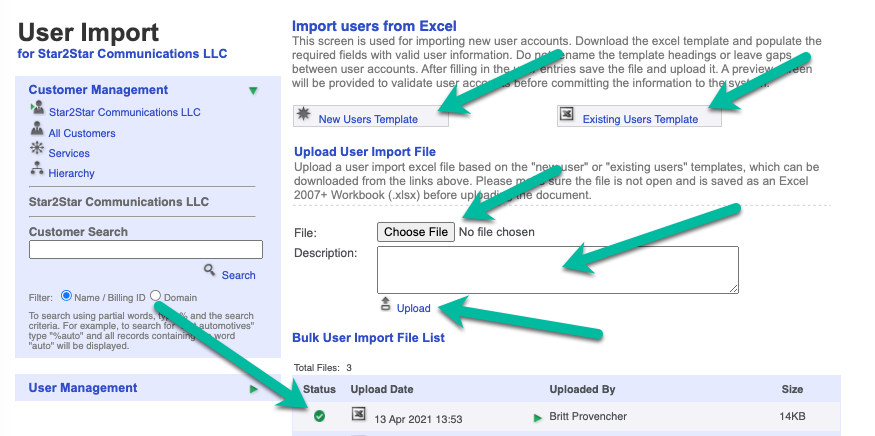
- Enter a Description in the text box.
- Click Upload.
- Once the upload shows a green status indicator, the users are provisioned and ready for login.
- Completion / Validation
- New users are created.