Connected Workspace Portal - New User Procedure:
Required Information
- Customer Name
- User Name
- User Info
- Create New User
- Browse to https://daasportal.star2star.io.
- Log into the Connected Workspace Portal using an account with DaaS Partner Admin, DaaS Partner Manager, or DaaS Solution Admin access.
- At the main menu, expand the Customers menu and click the Customers option.
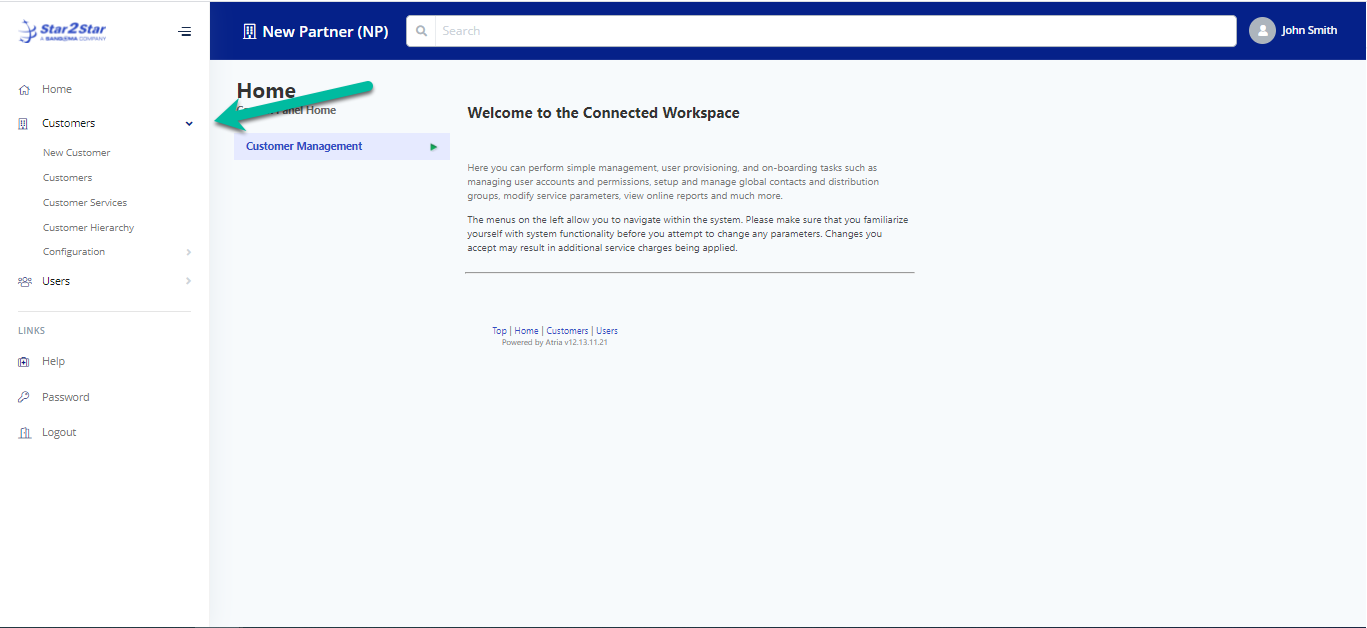
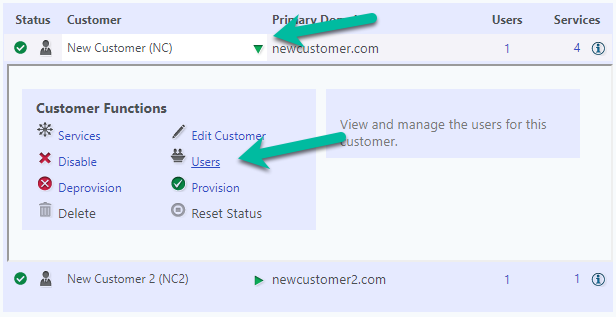
- Expand the Customer where the new user will be created and click Users.
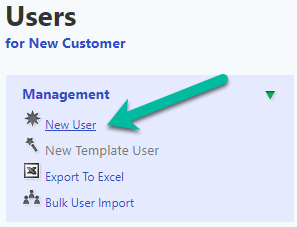
- In the Management section, click New User.
- At the Create User window, enter the user’s name and username.
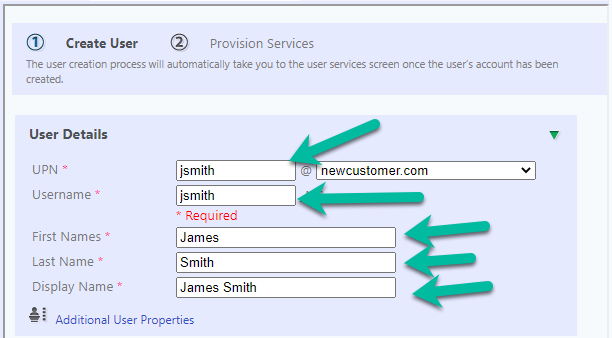
- For the UPN, enter the desired username and select the user’s primary email domain.
- For the Username, enter the user’s first initial and last name (Note: web browsers with an Autocomplete feature may automatically populate the username field).
- Enter the admin’s first and last names. The Display Name will be set automatically but can be corrected if necessary.
- Click Additional User Properties.
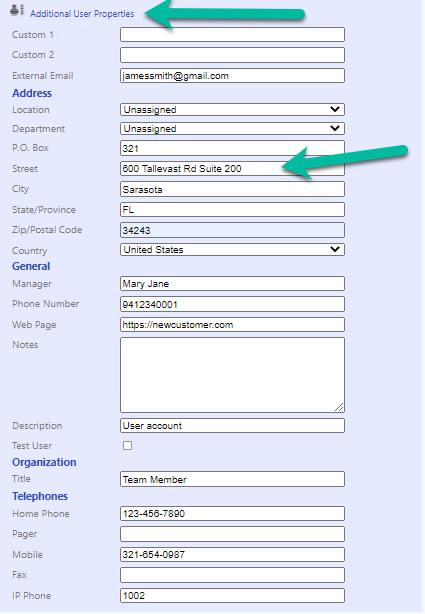
- Leave Custom 1 and Custom 2 blank.
- For External Email, enter a personal email account; this account will be used to send a temporary password.
- Leave Location and Department set to Unassigned.
- Populate the remaining administrative information as appropriate.
- For the initial password, enter a policy-compliant password that has a minimum of eight characters and and least two of three following:
- Upper- and lower-case letters
- Numbers 0-9
- Symbols such as !@#$%^&*()
- Additionally, the password may not contain nor be a variant of the username.

- Expand the Account Settings section, then click Advanced Options.

- Confirm that Change Password at Logon is set to Yes.
- Leave Account Disabled, Account Locked, and Account Expires set to No and Never, respectively.
- Expand Advanced Options.
- At the Common Roles dropdown, select DaaS User or DaaS Customer Admin as appropriate.
- Leave Email Addresses blank; the Portal will automatically populate the user’s email address.
- Click Provision.
- In the Provision Services window, expand the Citrix service.
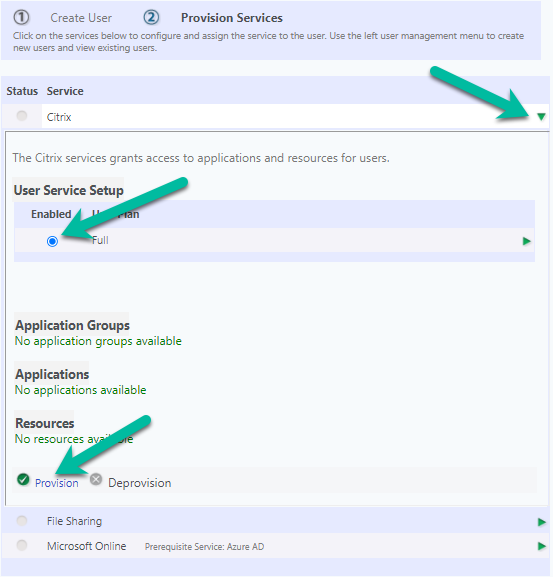
- Check the boxes for virtual desktops and applications that should be assigned to this user (at initial Customer provisioning, those resources may not be available yet. If so, click Provision with nothing selected to enable the service).
- Click Provision.
- In the Provision Services window, expand the File Sharing service.
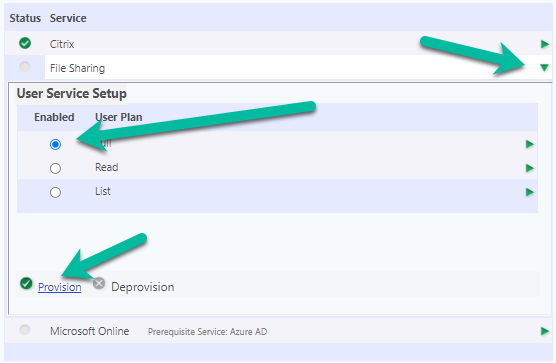
- In the User Service Setup section, click the Enabled radio button next to the access level this user should have to shared files in the Customer’s CorpShare (X:) directory:
- Full: The user can create, modify, and delete files and folders in the CorpShare directory and subdirectories.
- Read: The user can view the contents of files in the CorpShare directory and subdirectories, but they cannot modify, create, or delete files or folders.
- List: The user can only see the names of files and folders.
- Note that each user has full access to their home (Y:) directory. The access level set here only applies to the contents of the CorpShare (X:) directory.
- Click Provision.
- In the Provision Services window, expand the Microsoft Online service.
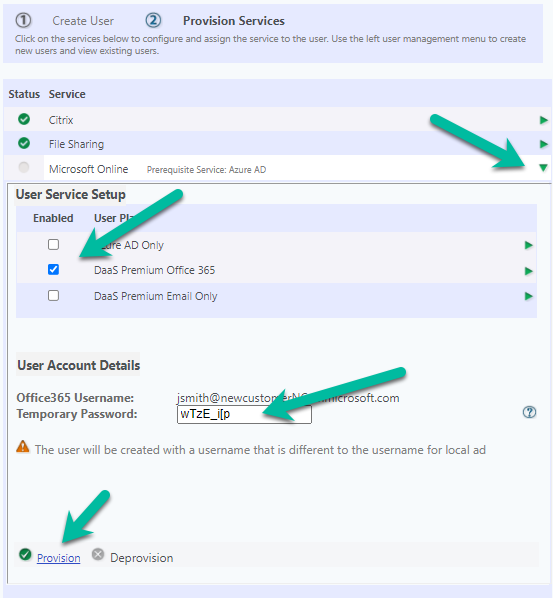
- In the User Service Setup section, check the box for the appropriate license. Note that multiple boxes can be checked in cases where an add-on license is required, however in most cases a user should only have a single license applied.
- The license levels are as follows:
- Azure AD Only: The user is present in the Customer’s Microsoft Office 365 tenant, however the user has no software licensed. This access level is usually used for test accounts.
- DaaS Premium Office 365: The user has an Exchange mailbox as well as the supported collection of Microsoft Office 365 software available, including common applications like Microsoft Word, Excel, and Outlook. This license includes additional features such as Microsoft To-Do and Teams.
- DaaS Premium Email Only: The user has an Exchange mailbox and Microsoft Outlook.
- Note: The user’s Microsoft Office 365 password will initially be set to the Temporary Password displayed, however once the user logs into the Connected Workspace Portal they will be prompted to change their password. Doing so will also change the password they use to log into Microsoft Office 365.
- Click Provision.
- The user is now created and can log into the Connected Workspace Portal. Star2STar recommends that new users log into the Portal, change their initial password, and answer their password recovery questions before logging into their virtual desktops.

- III. Completion
- New user is created.
- The user’s home (Y:) directory is created
- The user has access to virtual applications and desktops
- Optional: User is created in Microsoft Office 365.
- Optional: User’s mailbox is created in Exchange Online.
- No labels